LIMINAL's interface allows you to
activate any number sample-banks within a 12 x 8 grid. The
sample-banks are organized by 'instrument' along the Y-axis and
'articulation' along the X-axis. The banks are further clustered in
sets of 4, allowing you activate an ensemble and/or single
instrument performance(s). Ensemble performances are labeled by a
pyramid of three illuminated dots, whereas single instruments are
labeled by a single illuminated dot. You may activate/deactivate a
sample-bank by left-clicking on it.
Each sample-bank has a set of controls which can be modified and/or
modulated independently. This is labled as 'Articulation Settings'.
To access this set of controls, click on triangular-shaped button on
the upper-left corner of a given sample-bank. This will bring up an
overlay menu, allowing you to modify parameters of the sample-bank.
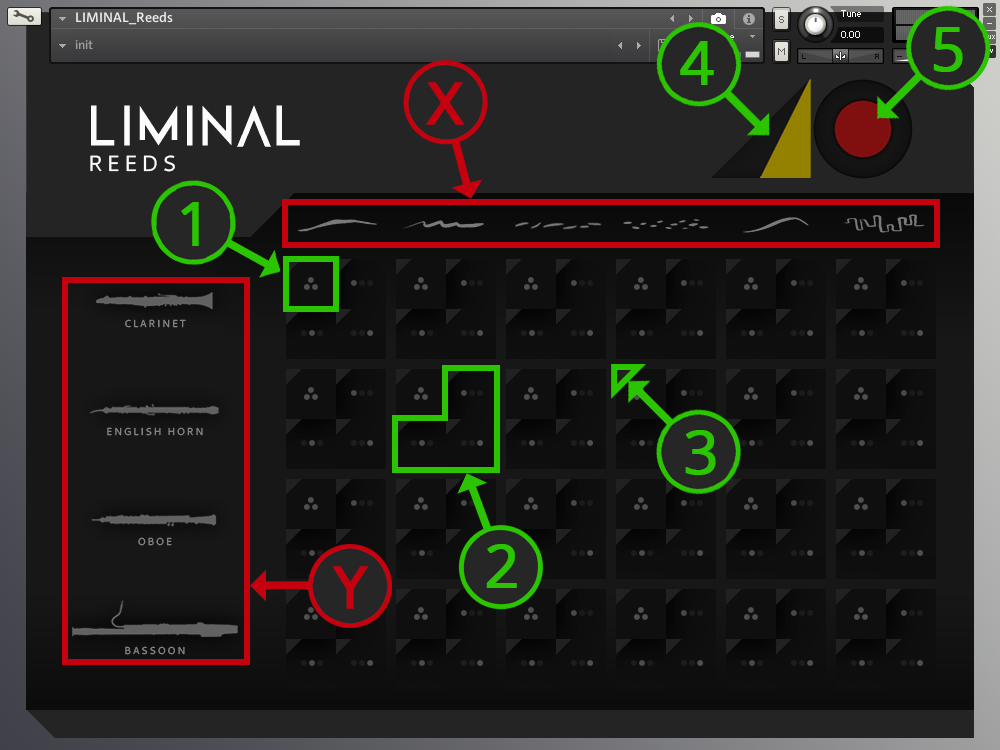
See below a diagram of LIMINAL's sample-bank selection screen.
X - Labels indicating articulation of sample-sets along the X-Axis
Y - Labels indicating the instrument of the sample-sets along the
Y-Axis
1 - Activate an Ensemble performance sample-set for the corresponding
articulation
2 - Activate a Solo performance sample-set for the corresponding
articulation
3 - Access the 'Articulation Settings' controls for the
corresponding sample-set
4 - Master Volume control
5 - Master Reverb control
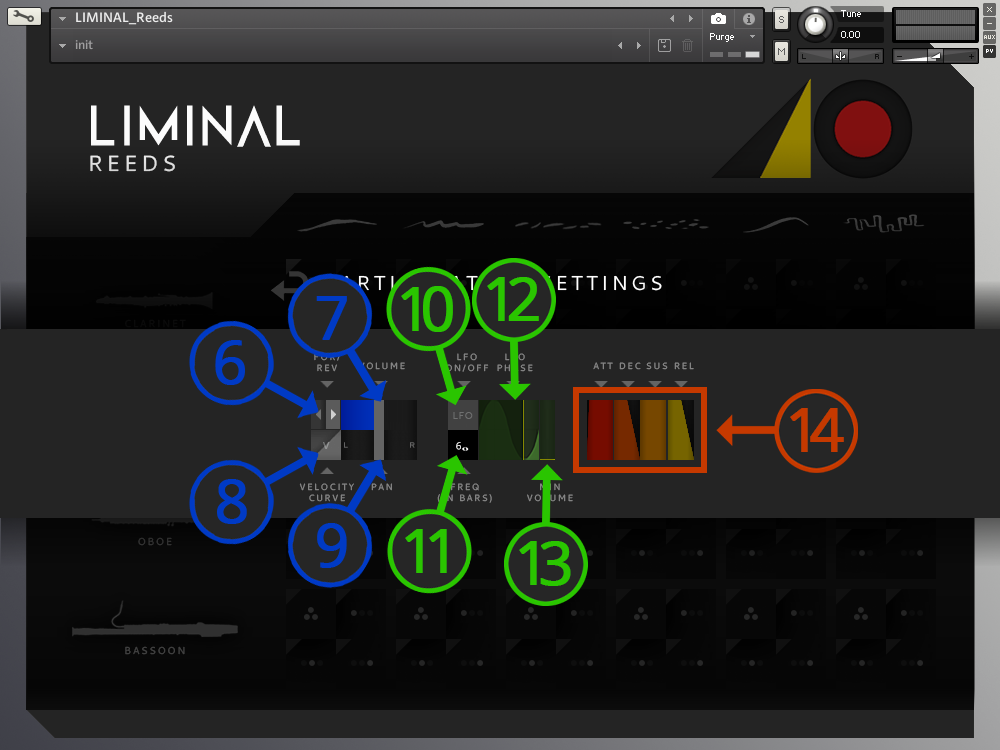
Upon engaging the 'Articulation
Settings' button, you will have access to controls shown in the
diagram below.
6 - Toggle switch to reverse playback
7 - Volume control
8 - Velocity sensitivity curve. Click-drag to adjust.
9 - Pan control
10 - Enable LFO button. This will allow the LFO to modulate volume in
relation to the host DAW's tempo
11 - LFO frequency. Click-drag to adjust. The display indicates the
number of bars to complete a single LFO cycle.
12 - LFO phase. Click-drag to adjust. The yellow line represents the
sample's start point of the cycle.
13 - Minimum Volume during the LFO cycle. Click-drag to set the volume
when the LFO wave is at it's trough.
14 - Controls for ATTACK, DECAY, SUSTAIN, RELEASE. Click-drag to
adjust