LIMINAL's interface allows you to
activate any number sample-banks within a grid. The sample
banks are clustered in sets of 3, allowing you activate an ensemble
and/or single instrument performance(s). Ensemble performances are
labeled by a glyphic, whereas single instruments are labeled by a
single illuminated dot. You may activate/deactivate a sample-bank by
left-clicking on it.
LIMINAL is comprised of 22 "core"
articulations. The "core" articulations have been recorded
closely to the microphone, with effort made to capture as much
character as possible. These banks employ a minimal amount of
post-processing - EQ, pitch correction, noise reduction, splicing,
etc.
Each sample-bank has a set of controls which can be modified and/or
modulated independently. This is labled as 'Articulation Settings'.
To access this set of controls, click on triangular-shaped button on
the upper-left corner of a given sample-bank. This will bring up an
overlay menu, allowing you to modify parameters of the sample-bank.
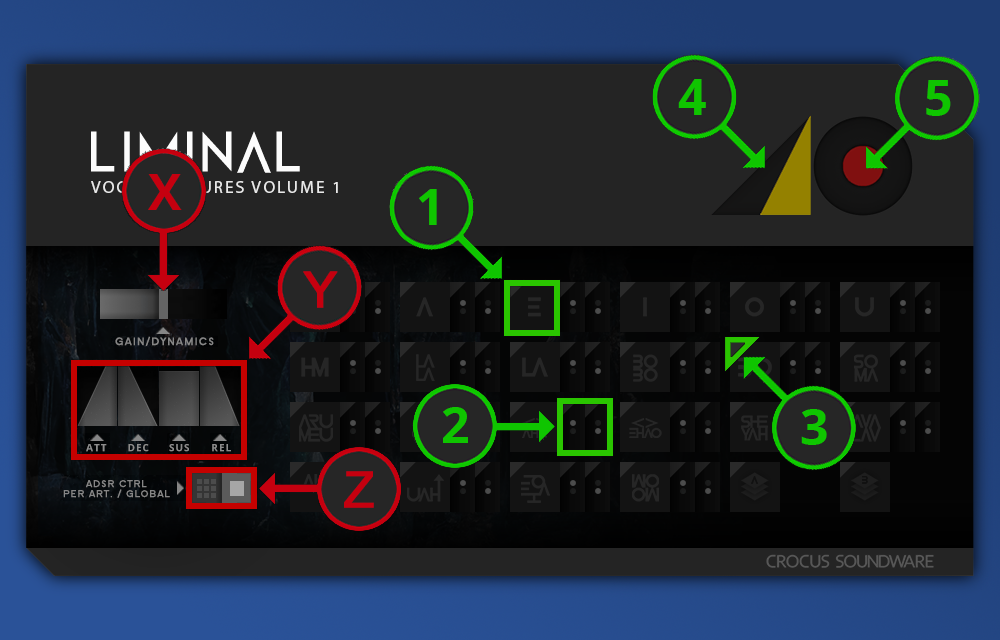
See below a diagram of LIMINAL's sample-bank selection screen.
X - Master Gain/Pseudo-dynamics control
Y - Instrument-wide ATTACK, DECAY, SUSTAIN and RELEASE controls
Z - Switch to toggle between per-articulation ADSR control and
Instrument-wide ADSR control
1 - Activate an Ensemble performance sample-set for the corresponding
articulation
2 - Activate a Solo performance sample-set for the corresponding
articulation
3 - Access the 'Articulation Settings' controls for the corresponding
sample-set
4 - Master Volume control
5 - Master Reverb control
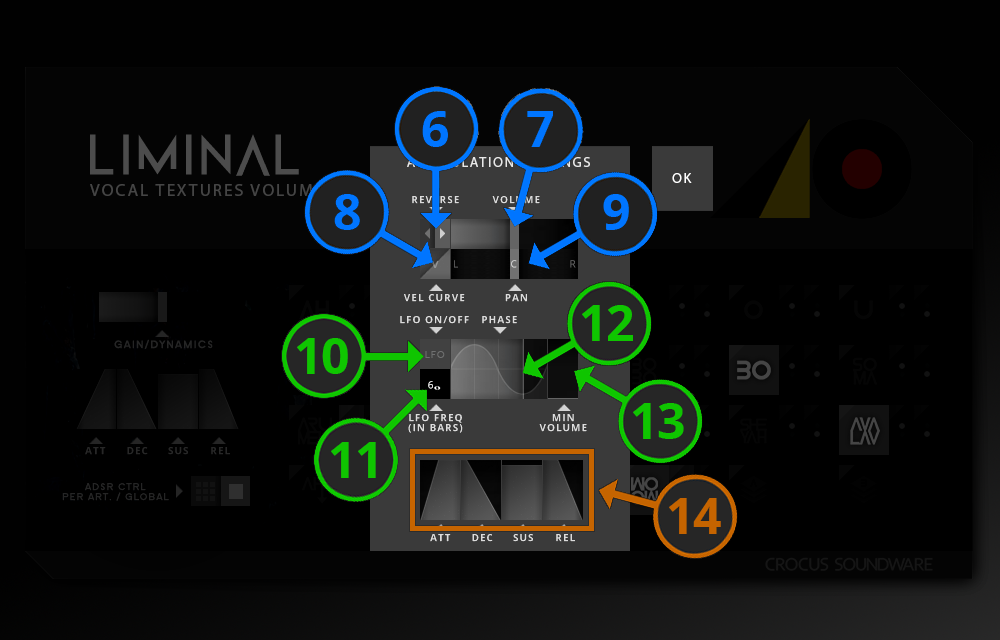
Upon engaging the 'Articulation
Settings' button, you will have access to controls shown in the
diagram below.
6 - Toggle switch to reverse playback
7 - Volume control
8 - Velocity sensitivity curve. Click-drag to adjust.
9 - Pan control
10 - Enable LFO button. This will allow the LFO to modulate volume in
relation to the host DAW's tempo
11 - LFO frequency. Click-drag to adjust. The display indicates the
number of bars to complete a single LFO cycle.
12 - LFO phase. Click-drag to adjust. The yellow line represents the
sample's start point of the cycle.
13 - Minimum Volume during the LFO cycle. Click-drag to set the volume
when the LFO wave is at it's trough.
14 - Controls for the associated articulation's ATTACK, DECAY, SUSTAIN
and RELEASE
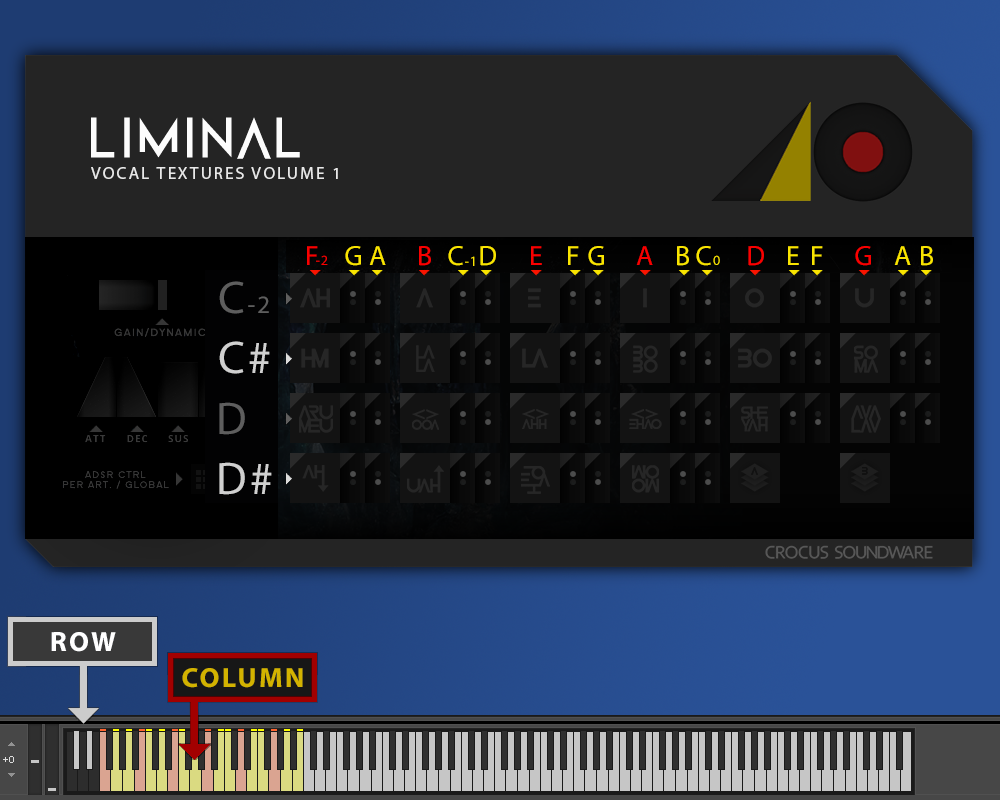
In addition to using the onscreen UI to
activate and deactivate Sample Banks, you can use MIDI controller
keyswitching. This is achieved by simultaneously pressing a
so-called Row key and a Column key. As depicted in the image below,
Row keys are highlighted in an inverted-white/black color scheme,and
cover C-2 to to D#-2 on the keyboard, while Column keys are
highlighted in yellow/red and cover F-2 to B0 on the keyboard. Say
you wanted to activate the 'LA' ensemble sample bank using
keyswitching, you would simultaneously press the C#-2 and E1-1 keys.
This would be functionally identical to clicking on the pictorial UI
button, and will visually illuminate the button in exactly the same
way. To deactivate the sample bank, simply repeat the Row/Column
keyswitch combination.